Did you know you can transform a bright daytime photo into a realistic nighttime scene in just a few steps? Creating a day to night effect in Photoshop is surprisingly simple when you use adjustment layers, blending modes, and some manual light painting. In this tutorial, I’ll guide you through how to turn day into night and add natural-looking lighting effects to achieve realistic results.
Chapters:
0:00 Turn Day to Night in Photoshop
0:10 Add a Lookup Table (LUT)
0:24 Add a Curves
0:34 Add a Gradient Map
0:50 Duplicate Image
1:00 Add a Photo Filter
1:19 Paint in Lighting Effects
1:45 Add Curves for More Shine
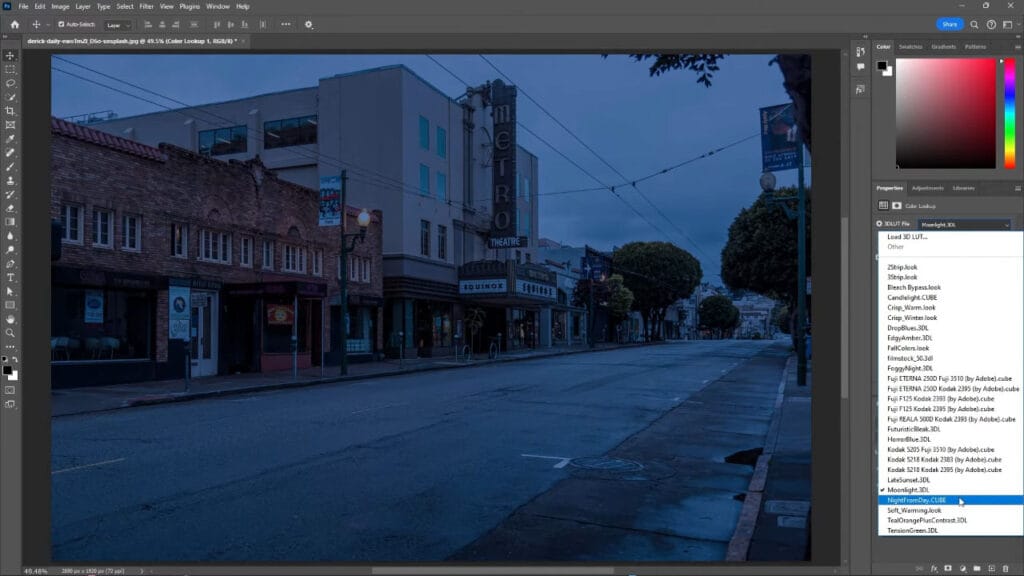
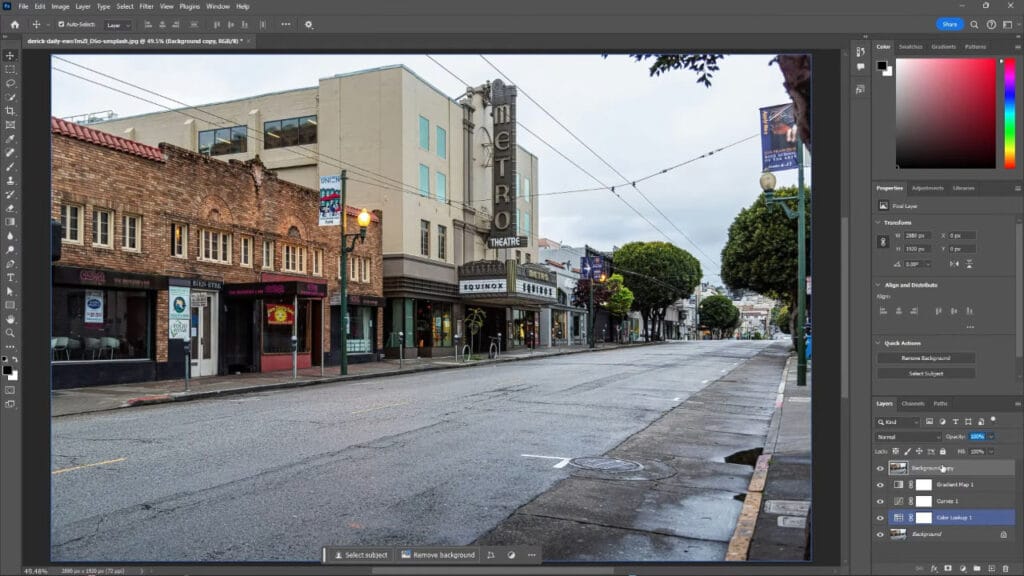
Step 1: Add a Color Lookup Table (LUT)
Start by adding a Color Lookup Adjustment Layer. LUTs (lookup tables) allow you to apply preset color effects to your image.
- Go to Layer > New Adjustment Layer > Color Lookup.
- Photoshop offers several LUTs you can experiment with:
- Foggy Night (creates a twilight look)
- Moonlight (gives a cool night effect)
- Night from Day (the most natural day-to-night conversion)
For this tutorial, I will use Night from Day.
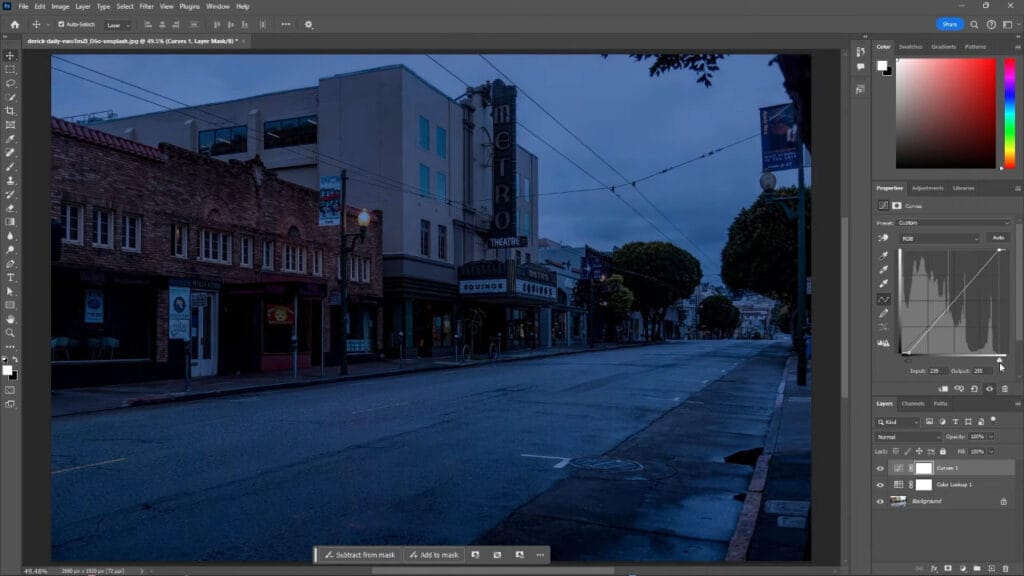
Step 2: Adjust with Curves
Next, add a Curves Adjustment Layer to fine-tune brightness and contrast.
- Drag the left handle inward to darken the blacks.
- Move the right handle slightly to brighten the whites.
This balances your tones and sets up the foundation for a nighttime look.
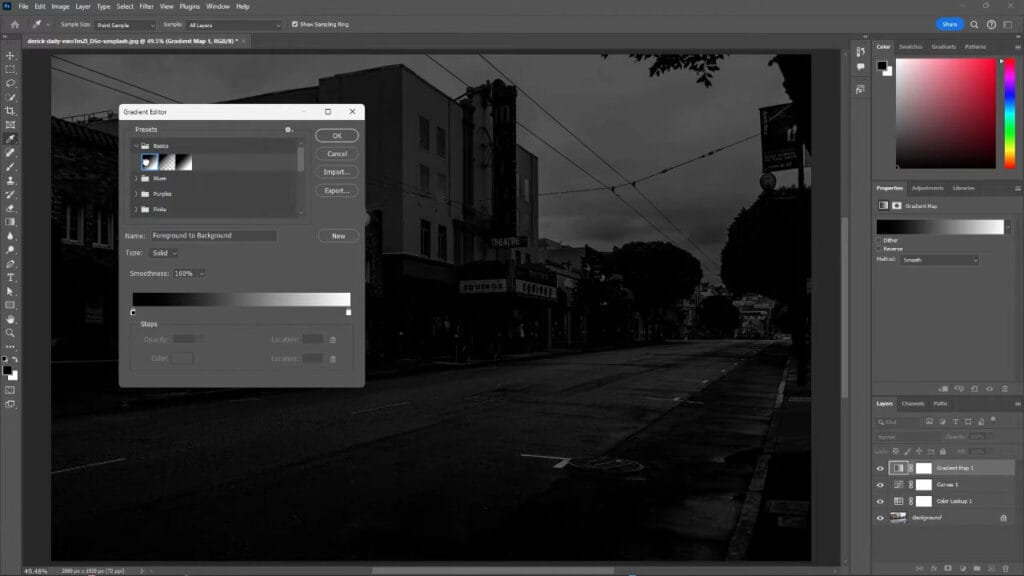
Step 3: Apply a Gradient Map
A Gradient Map helps tint the overall image, refining the look from day to night in Photoshop and giving the photo a cooler, nighttime feel.
- Add a Gradient Map adjustment layer.
- Click the gradient to open the Gradient Editor.
- Choose one of the presets from the Basics folder and hit OK.
- Change the blending mode of the Gradient Map to Soft Light.
- Lower the opacity to around 50% for a subtle effect.
Step 4: Duplicate the Image and Prepare for Lighting
To create realistic lighting, duplicate your original image and move it to the top of your layers.
- Hold Alt (Option on Mac) and add an inverted layer mask (black mask).
- Temporarily hide the Color Lookup so you can focus on lighting effects.
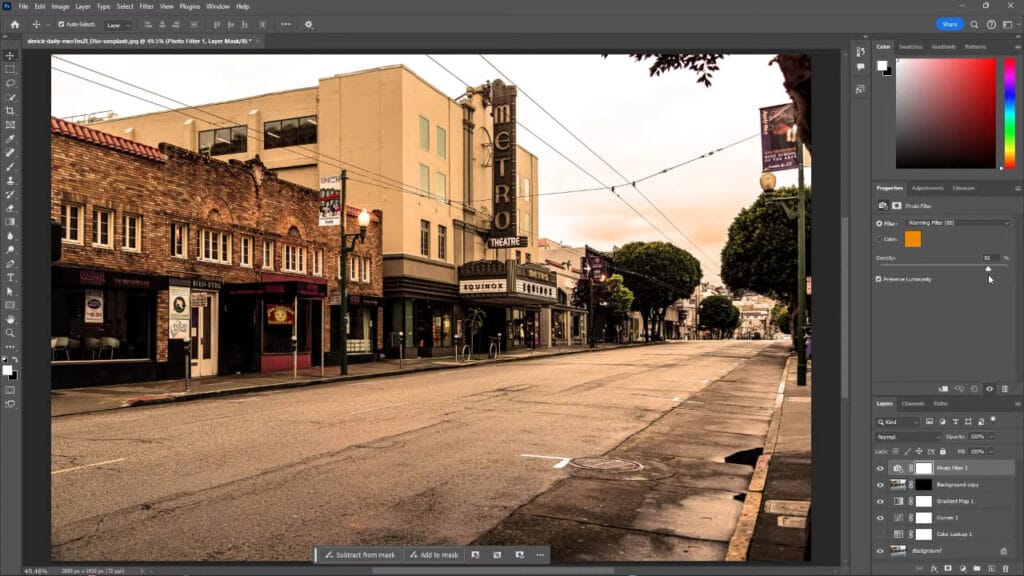
Step 5: Add a Photo Filter
Now, let’s add some realistic lighting.
- Add a Photo Filter Adjustment Layer.
- Increase the density (around 85% works well).
- Select a natural-looking warming filter for your scene. The Warming Filter (85) looks realistic for my image.
- Create a clipping mask by holding Alt (Option on Mac) and hovering between the Photo Filter and your image so the filter only applies to the duplicated image.
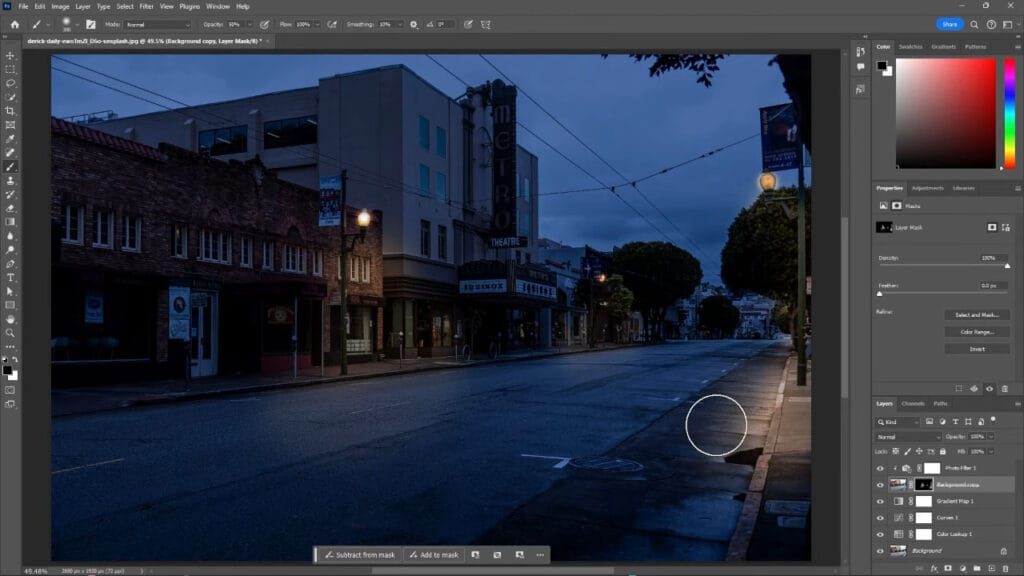
Step 6: Paint in Lighting Effects
This is where your scene comes to life.
- Select the black layer mask next to your top image.
- Re-enable your Color Lookup layer.
- Choose the Brush Tool (B).
- Set hardness to 0%, opacity to 50% or less, and adjust brush size with the square bracket keys.
- With white as your brush color, gently paint where you want light sources or highlights to appear.
This simulates artificial light such as lamps, windows, or moonlight.
Step 7: Add Extra Shine with Curves
For a finishing touch, add another Curves Adjustment Layer.
- Place it below your Gradient Map layer.
- Brighten the image by dragging the right handle inward.
- Invert the layer mask (Ctrl/Command + I).
- With a soft white brush, paint into the mask where you want extra shine or light emphasis.
Final Thoughts
By using a few adjustment layers and some creative brushwork, you can dramatically transform a photo. This day to night in Photoshop technique allows you to convert an ordinary daylight scene into a moody, cinematic night shot that feels both realistic and atmospheric.
If you found this tutorial helpful, feel free to share it, subscribe to the YouTube channel, or read more on our blog for more Photoshop tips and tricks.