Adding texture to your designs can enhance the visual appeal and bring depth to your artwork. In this guide, we will explore different techniques to incorporate grain texture into your design using Adobe Illustrator. Whether you’re working with dark or light objects, radial gradients, gradient meshes, or colorful gradients, we’ve got you covered.
Chapters:
0:00 Add Grain Texture in Illustrator
0:23 Using a Linear Gradient
1:26 Adding Grain Texture to Dark Objects
2:20 Using a Radial Gradient
2:44 Adding Grain Texture to Light Objects
3:18 Using a Gradient Mesh
4:41 Adding Grain Texture to Color Gradients
Using a Linear Gradient
To start, select the shape you want to add a grain texture to and open your Appearance panel, which you can find under “Window” and then “Appearance.” At the bottom of the panel, click the “Add New Fill” button and then choose the “Gradient Tool.” Alternatively, use the keyboard shortcut “G” to access the Gradient Tool. Click on your shape to apply the gradient fill and drag it in the direction you desire for your grain texture.
Adding Grain Texture to Dark Objects
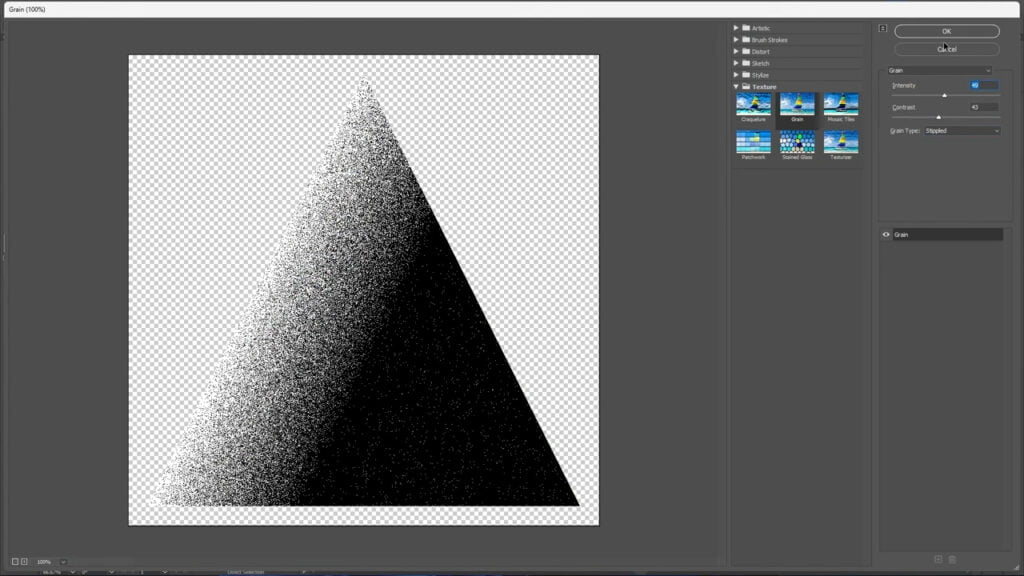
After adding the gradient, you’ll notice a new fill in your Appearance panel. Ensure this new fill is selected, and click the “FX” button. Under “Texture,” select “Grain.” Other grain texture options under the “Pixelate” menu, such as “Mezzotint” or “Pointillize,” can be used for larger grain textures.
In the Grain effect window, you can choose the “Grain Type,” with “Stippled” often yielding excellent results. Adjust the “Intensity” and “Contrast” sliders to fine-tune the grain effect. Click OK to add the grain texture, and you’ll see it in the Appearance panel. To achieve a softer texture, reduce the opacity under the grain effect.
Using a Radial Gradient
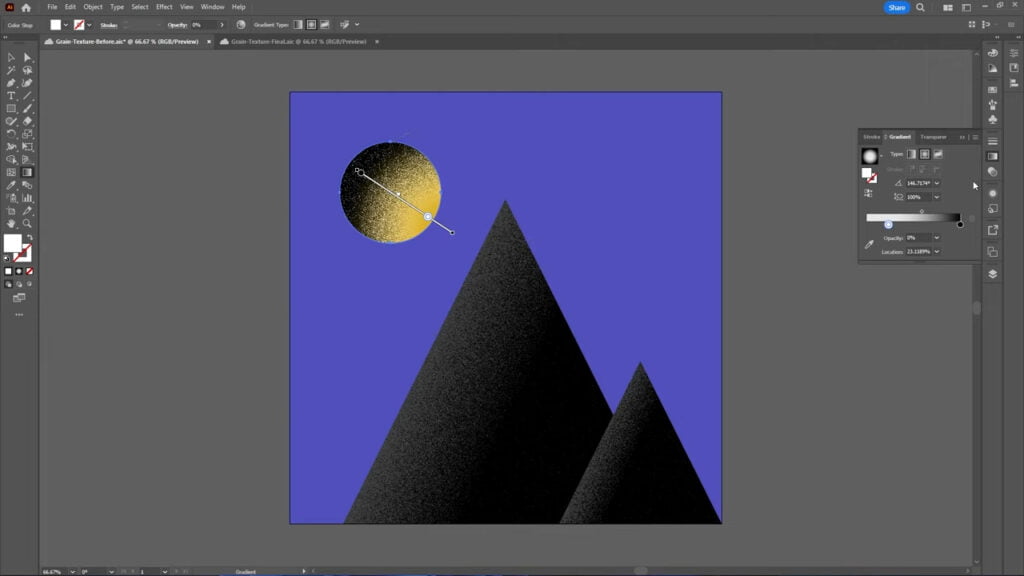
For circular objects, adding a grain texture is similar. Apply a gradient following the previous process, but this time choose “Radial Gradient” in the gradient panel. After selecting the gradient, click the “FX” button to add the grain effect.
Adding Grain Texture to Light Objects
In the Gradient panel, select the white color and set the opacity to 0; this will be your highlight. In the Appearance panel, select the grain texture and adjust its opacity to your preference for the shadow grain effect.
Using a Gradient Mesh
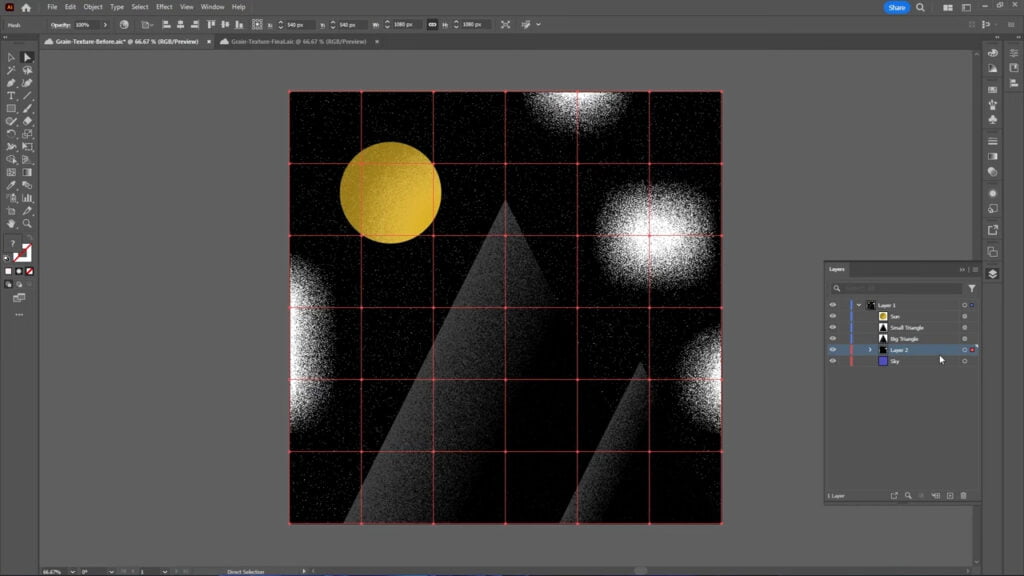
To create a grain texture with a gradient mesh, begin by making a new shape that matches the size of your artboard and fill it with solid black. This allows you to use blending modes to edit the grain texture. With the black shape selected, go to “Object” and choose “Create Gradient Mesh.” You can add or remove rows and columns for more or less detail.
Use the “Direct Selection Tool” to select various anchor points within the gradient mesh, then modify the fill of those selected points. With the entire layer selected, navigate to “Effect,” “Texture,” and pick “Grain” to apply the grain texture to your gradient mesh. In the “Opacity” settings at the top, adjust the Blending Mode to either “Lighten” or “Darken,” depending on your desired effect. “Lighten” removes black, while “Darken” removes white from your image. Adjust the opacity to create a softer texture.
Adding Grain Texture to Color Gradients
Finally, you can combine these techniques for a multi-colored gradient. Duplicate your gradient, convert the colors to black and white, and then add the grain texture. All of these changes can be made non-destructively within your Appearance panel.
Conclusion
These Illustrator techniques provide you with versatile methods to introduce captivating grain textures into your designs, enhancing their visual impact and depth. Experiment with these methods, and you’ll discover endless possibilities for creating a distinctive and stylish grain texture in Adobe Illustrator.
For more creative tips and tricks like this, visit our blog.
