If you created a table in InDesign only to find it won’t move with your text, you’re not alone. Fortunately, there’s a simple way to embed your table inside a text frame so it flows to the next page of your document. In this post, I’ll guide you through the steps to create a dynamic and stylized table that moves with your content.
Chapters:
0:00 Move Table With Text in InDesign
0:19 Create a Table in InDesign
1:10 Style Table Rows and Columns
2:33 Style Table Header and Footer
Insert a Table That Moves With Your Text
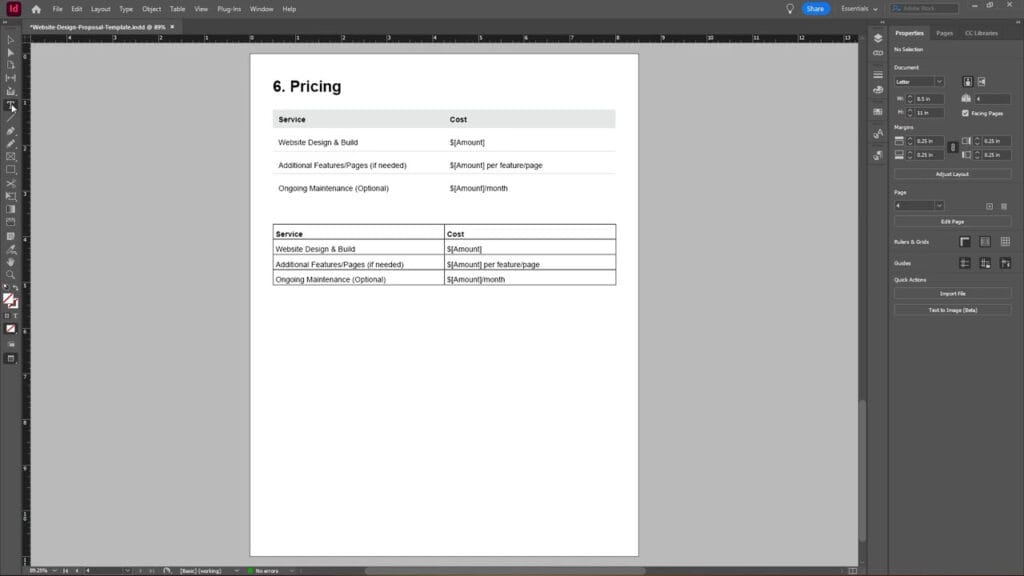
By default, when you insert a table by simply dragging it out on the page, it’s not connected to your text flow. That means if you add or remove text above the table, it won’t shift position automatically. To fix this:
- Select the Text Tool and click inside your text box where you want the table to appear.
- Go to Table > Insert Table.
- Choose your desired number of rows and columns, including a header row if needed, then click OK.
Now your table is embedded directly within your text frame. As you add or remove text, the table will shift accordingly.
Basic Table Styling
To make your table more visually appealing, start with some basic styling:
- Click inside the table using the Text Tool to highlight it.
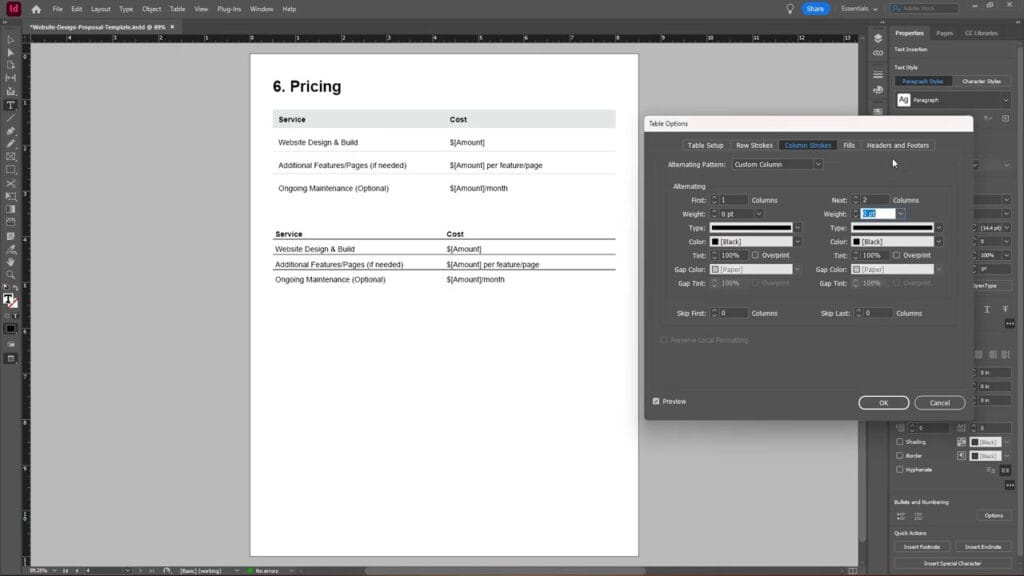
- Go to Table > Table Options > Table Setup.
From here, you can:
- Remove the outer table border by setting the Table Border Weight to 0 pt.
- Remove vertical column strokes by:
- Changing Column Strokes > Alternating Pattern to Custom Column.
- Setting the Weight of the first alternating column to 0 pt.
You can repeat the process for any additional vertical strokes you want to remove.
Row Styling and Alternating Fills
To enhance the visual hierarchy of your table:
- Under Row Strokes, change the Alternating Pattern to Custom Row.
- Set the stroke Weight to something subtle like 0.25 pt.
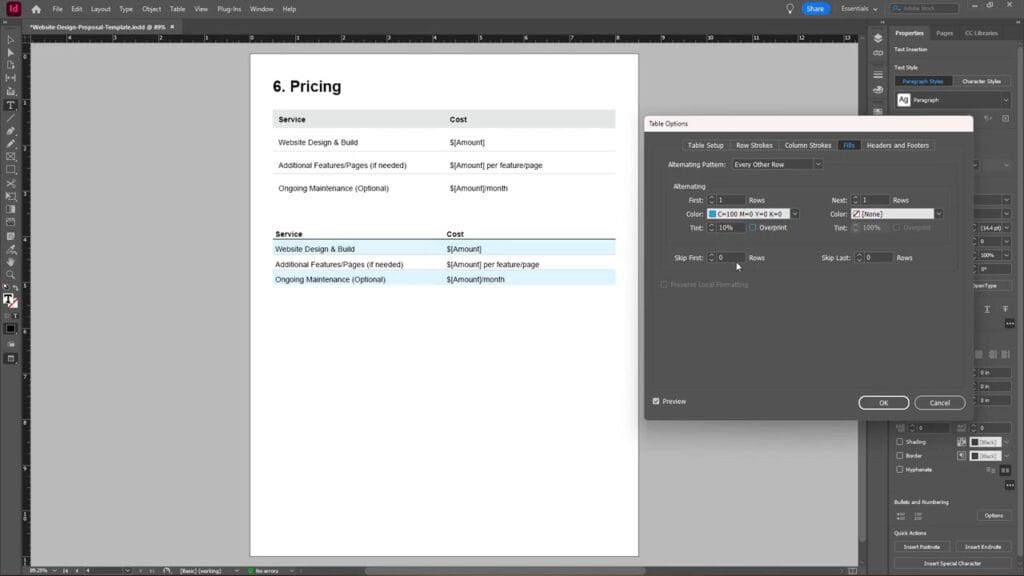
If you want alternating row colours:
- Go to the Fills tab.
- Set the Alternating Pattern to Every Other Row.
- Choose a fill colour (e.g., cyan) and adjust the tint to suit your design. For a lighter look, something like 20% cyan works well.
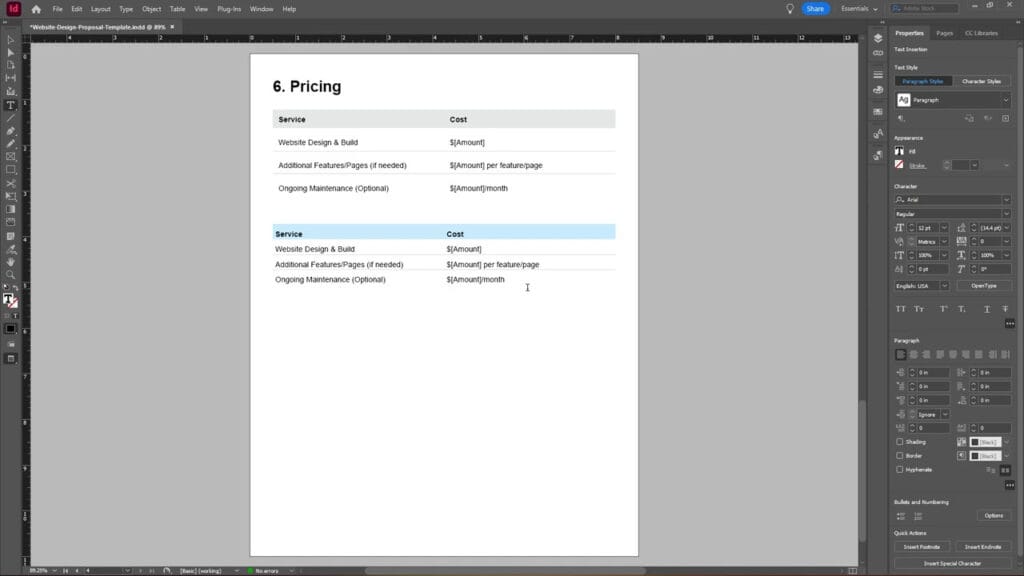
Customizing Header Cell Appearance
To style your header row separately:
- Highlight the header cells.
- Go to Table > Cell Options > Strokes and Fills.
- Set the Fill Colour (e.g., cyan at 20% tint).
- Remove the cell borders by setting the Stroke Weight to 0 pt.
After clicking OK, your header will display with the new background colour.
Add Cell Padding for Better Spacing
To give your table a cleaner, more polished look:
- Highlight the cells you want to add spacing to (e.g., header or body cells).
- Go to Cell Options > Text.
- Under Cell Insets, increase the padding values. Make sure the insets are linked if you want uniform spacing on all sides.
Repeat this step for your header cells as well.
Final Thoughts
By embedding your table inside a text frame and applying thoughtful styling, you can create a clean, professional table that flows with your content. If you’ve ever struggled to move a table with text in InDesign, this method solves that issue by ensuring your table stays anchored within the layout. Whether you’re working on a magazine, report, or brochure, this technique helps keep your design dynamic and organized.
If you found this tutorial helpful, feel free to share it, subscribe to the YouTube channel, or read more on our blog for more InDesign tips and tricks.