Outline missing fonts in Illustrator without the need to search for the same font or replace it with a substitute. This is a common problem when importing a PDF file with text that is not embedded or converted to outlines. But not to worry, I will show you how to fix missing fonts straight inside Illustrator with this quick and easy tutorial.
1. Import Your Document in Illustrator
You will want to begin by creating a new document in Illustrator. If you know the dimensions of the file you want to import, feel free to use these dimensions. If not, you can always change your artboard size later. Next, import your file with the missing fonts you want to outline by going to File > Place. You can also simply drag and drop the file from your file explorer into your open Illustrator document.
2. Outline Missing Fonts in Illustrator
If you highlight your document and select the Embed button, you will likely see a message telling you there are missing fonts in your document with the dreaded pink background.
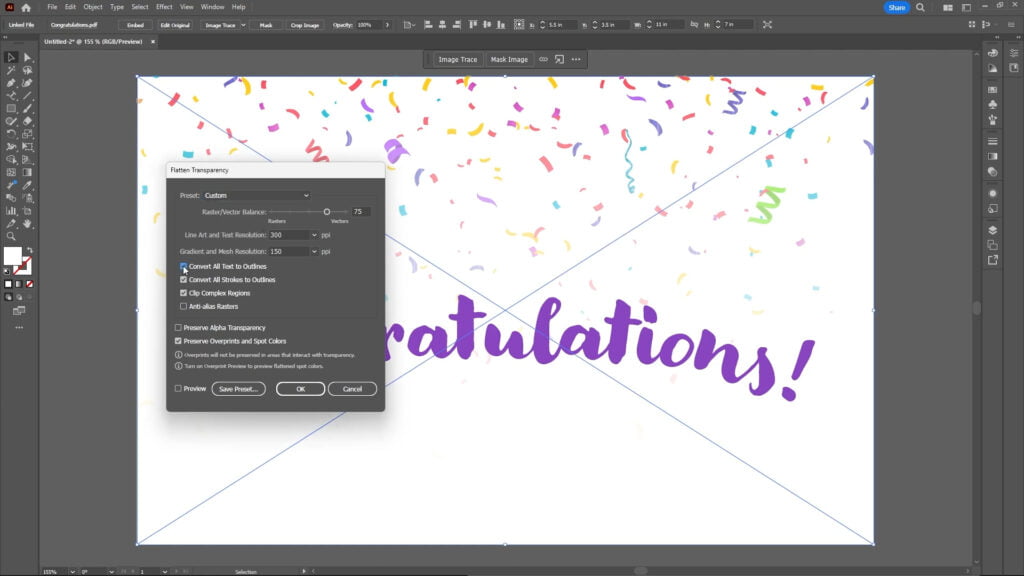
Instead, You will want to highlight your text and go to Object > Flatten Transparency. Ensure that you check ‘Convert All Text to Outlines,’ then click OK.
Now that you’ve converted your missing fonts into outlines, access Wireframe mode by pressing Command or Control and Y to see the changes.

Watch this video on our YouTube channel for a visual and auditorial way to learn. For more helpful tutorials like this, check out these free Adobe Illustrator tutorials on our blog.